Chicks 101
- Heather Carter
- Mar 15, 2022
- 5 min read

Updated: Jun 28, 2022

When Easter arrives in our little southeastern Idaho farm town, elementary-school kids come home with coupons for free chicks (with purchase of a bag of feed). They pull out their savings and pour over buy-one, get-one-free deals, dragging their parents up to chirping baby birds at the local co-op gas station or Cal Ranch store. It's no mystery to my family that I want the chicks just as badly--despite my mother's continued pleadings to "Simplify your life!" Last spring, the kids and I bought an initial authorized group of three chicks and then snuck in another two... (or three) under the not-so-watchful eye of their father.

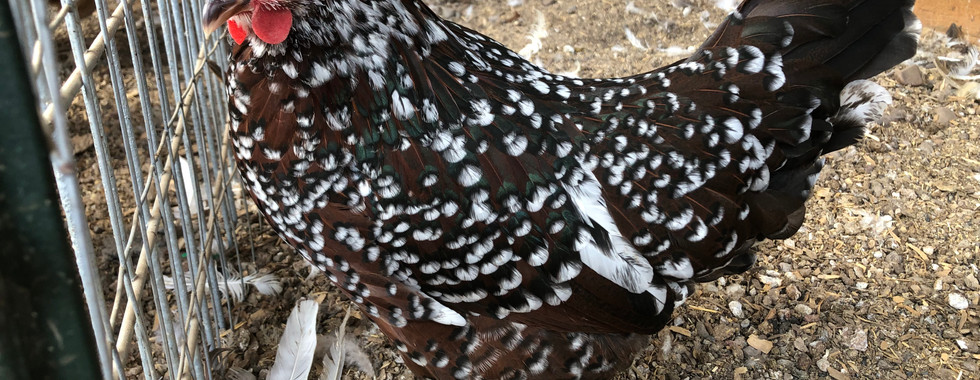
The sheer variety of chicks always entices me: the elegant Silver-laced Wyandotte, which can withstand colder temperatures; the Speckled Sussex, which lays habitually, holds a simple beauty, and is an easy family friend; the dark black-and-green lustered Australorpe, perfect for her docile temperament and regular brown-egg laying. I can't tell you how much I love our Australorpe (I've saved her twice from dog attacks, and was greatly saddened when there were no Australorpe chicks in town this year).
Easter Eggers (Araucanas and Americaunas) with all sorts of colored feathers, are good for blue and light green eggs. We have a Rhode Island Red - just for the classic sense of owning a hardy American egg-layer. Our Buff Orpington provides regular eggs and acts as a good brooder--if you're into that kind of thing. Plus there's unending pleasure in observing her classic portrayal of a mother hen. The heaviest of all our hens, she always appears to be wearing a large skirt.


This year we're adding two Speckled Sussex, a Barred Rock, a Silver-laced Wyandotte to replace the one who died last year, and a couple classic White Leghorns, who prolifically produce white eggs. We've made decisions about the chicks we plan to purchase based on egg-laying, hardiness, and appearance of both hens and eggs. Last year we experimented with Bantams (miniature chickens which might be a good option if you live in a smaller space). However, in our experience it's not the best option to mix larger chickens and Bantams if you don't want the older hens to cannibalize the young female pullets. You will similarly want to consider varieties based on your available space, environment, desired production, and preferred temperament of flock.
Supplies
Once you have your little chicks picked out and purchased, don't forget to also come home with the following supplies:


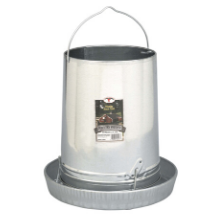

A Feeder and Waterer - You'll need some kind of containers to distribute food and water to the chicks. Depending on the amount of chicks you purchase, you may have to freshen the food and water supply once or twice every day. Feeders can be as simple as a bowl, and as intricate as a metal dish with separate feeding troughs for multiple chicks. The cheapest waterer I've found is a plastic lid you can attach to a glass jar and invert it, effectively turning it into a watering dish. This setup doesn't have to cost you more than $10. Easy Amazon options
Heat Lamps - You'll want to set up a heat lamp to keep your new chicks at a warmer temperature, since they can't regulate their own heat. You can find heat lamps at any pet store. I like ones that offer a metal safety cage over the bulb. We've nearly started a fire with a heat lamp before, so make sure yours is strongly secured and unlikely to fall, even with exploring children's hands.
Bedding - I like using shredded pine. A bag of 10 cubic feet usually costs me around $9 at the local feed/farming store.
A Brooder - A brooder or other enclosure creates a place you can house the chicks until they have grown large enough to move to a coop or incorporate into your larger flock.
Some Brooder Options:
1. A very large fish tank, reptile cage, or even a large, plastic storage container -
Positives: containment, heat, and safety
Negatives: a smaller space will require more frequent cleaning
2. Freestyle construction - Use boards, boxes, or something else to form walls, creating an adjustable enclosure. Bedding can be scattered right on the garage concrete.
Positives: easy access to chicks; easier to change out water or food; may cost nothing
Negatives: exposure (less heat and safety); more messy in your living space or garage
3. A plastic pool brooder (see instructions for construction below) -
Positives: containment; heat; safest option with heating lamps because of the wire caging; larger space with room to grow; less cleaning
Negatives: more difficult access to chicks makes it harder to change food and water


Constructing the Pool Brooder:
I set up this plastic pool brooder with a focus on making things easier to manage this year. The whole schema was prompted off of a Pinterest image. I love the ease and effectiveness of this brooder. Contains the chick bedding in one area, but still gives them a lot of space to grow. They grow quickly and they can make a lot of mess, so... The only downside is that it makes it more difficult to access the chicks. To construct this brooder, you'll need the following supplies:
Two plastic pools (make sure these are the same size)
One hoolahoop
Wire mesh (we just used extra __-guage wire we had on hand)
Wire
Bungee cords
Drill
Screws with screw-on bolts
Trace a circle on the bottom of one of your plastic pools, just a little smaller than the size of your hoolahoop. Cut the circle of plastic out of the bottom of the pool, using a razor, carpet cutter, or heavy duty scissors. Fit the pool with a hole, inverted, on top of the second pool, as shown in the picture. While aligning the pools, drill holes for screws at 3ft intervals along the pool edge around the circumference of the pool. Fit the screws up through the bottom of each hole and fasten with bolts.
Unroll wire mesh and lay hoolahoop on top. With wire cutters, cut out a circle, slightly larger than the loop. Wire the sheet to the hoolahoop using small strips of wire. Fill the brooder with bedding, and attach hoolahoop across the pool opening with bungee cords. Heat lamps can be placed on top of the wire. When you need to feed or water chicks, remove the lamps and the meshed hoolahoop to get inside the brooder.
Tips for Chicks
Since this is our third year raising chicks, I've come up with my own tips and tricks on how to best manage care for these babies while they're young:
Put your food trays and watering containers up on bricks or stones so they stay cleaner. Chickens like to roost, so they'll hop on top of your waterer and without a care in the world, lop off poops in the watering tray.
If you have a larger number of chicks, even with just 4-6, get a larger feeding tray. This will allow you to replenish the food less often. Weigh things down with something heavier so it's more difficult for growing chickens to tip over food.
House your brooder in the garage or other location where you can easily clean out the waterer and feeding tray. I stick my tray over the garage garbage can, fill it up with the big sack in the garage and I'm done. We can dump the old water outside and refill from the hose without ever having to go inside the house.
Make sure you have safety measures in place and strong attachments for heat lamps, which can cause fires. (and have in our house)
Don't place the heat lamp directly in the center of your brooder. The chicks may need a cooler place to escape to if the weather gets too hot.
When the chicks have grown into "teenagers," and are ready to move out into the big coop--or incorporate into a larger flock--that is another post for another day, but make sure you go through the safety measures before moving your chicks. (Predators; Pecking, blood-thirsty chickens; Heat; Nesting boxes)


Comments